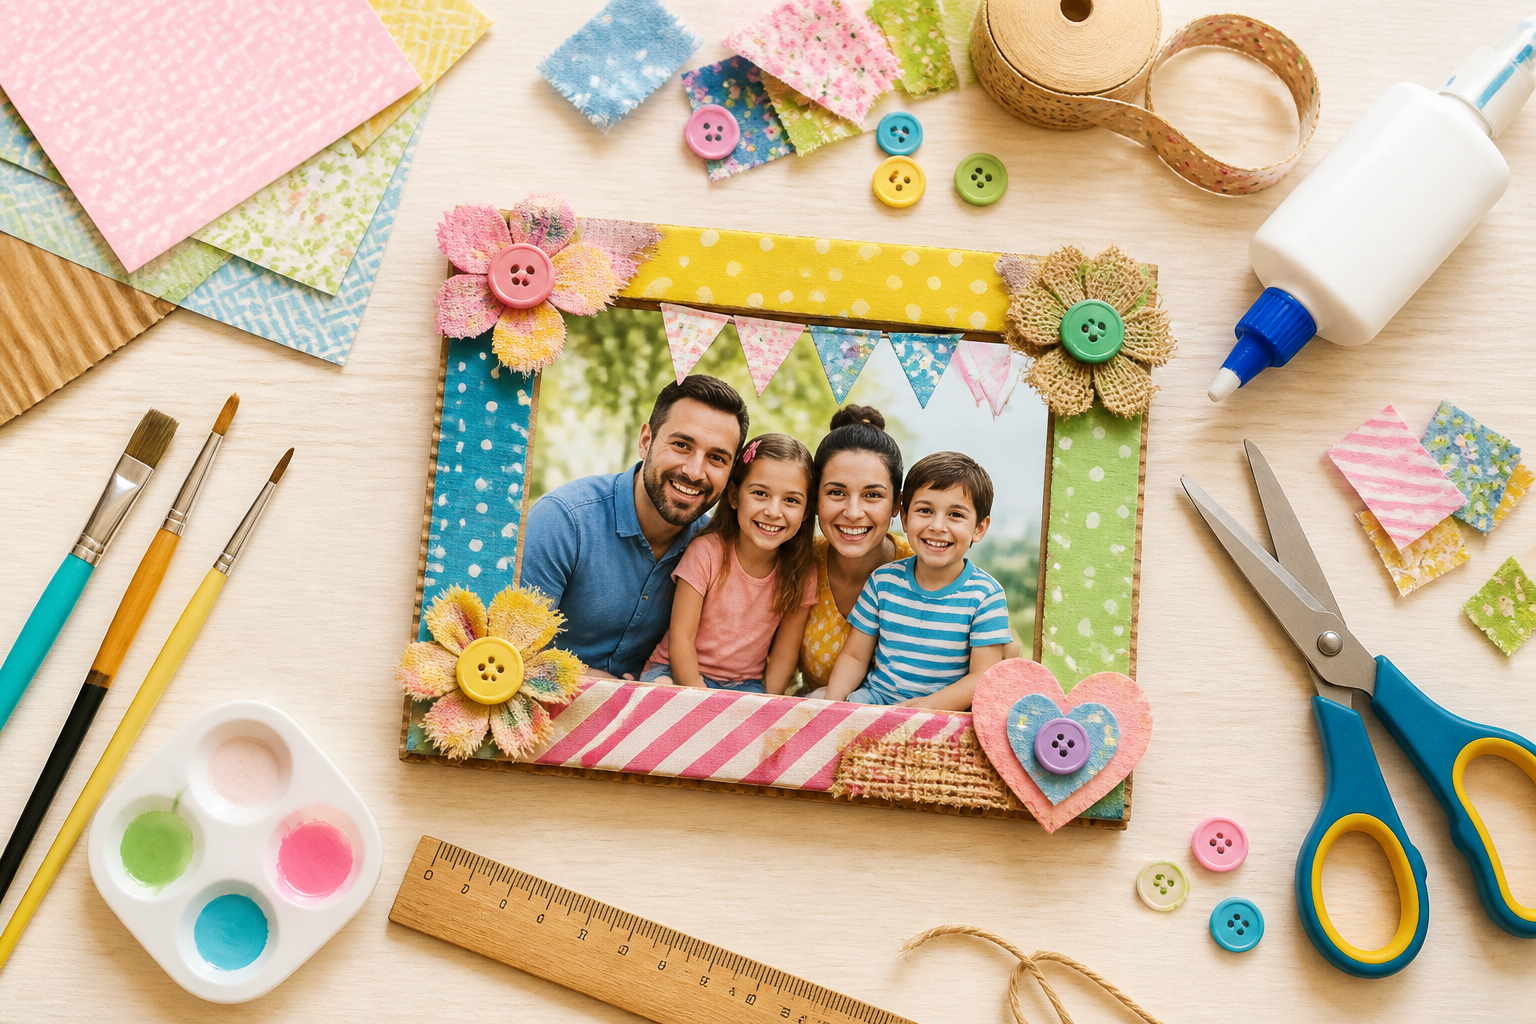
This beginner-friendly guide explains how to make photo frames, fit your picture accurately, and add color, texture, and personality. Whether you are preparing a family keepsake, a classroom project, or a small piece of home decor, the process can be adapted to your available time and skill level.
What You Need to Make a Custom Photo Frame
The exact supplies depend on the type of frame and the style you want to create. Start with a simple base and add decorative materials as needed.
- Cardboard, cardstock, foam board, or an unfinished wooden frame
- A printed photo
- Pencil, ruler, and eraser
- Scissors
- Craft glue or double-sided tape
- Paint and paintbrushes
- Colored paper, scrapbook paper, or fabric scraps
- Buttons, beads, ribbon, shells, stickers, or paper shapes
- Optional: a craft knife, cutting mat, sandpaper, clear sealer, and hanging hardware
If children are participating, choose washable, non-toxic paint and child-safe glue whenever possible. Large decorations are generally easier for young children to handle than tiny beads or small buttons. Sharp tools, hot glue, and materials that could be swallowed should be used only with close adult supervision.

Choose and Prepare the Frame Base
Your frame base affects both the appearance and the durability of the finished project. Cardboard is inexpensive and easy to cut, making it a useful choice for a quick craft or temporary display. Cardstock works well for lightweight frames, especially when you want to fold or layer paper. Foam board creates a thicker frame with clean edges, although it requires careful cutting.
An unfinished wooden frame is a good option when you want a sturdier result. Many craft stores sell plain wood frames that are ready to paint, stain, or decorate. Before beginning, wipe away dust and lightly sand any rough edges. Use fine sandpaper and work gently so the surface remains even. Remove the sanding dust before applying paint or glue.
Choose a frame size that suits the photo. A standard print is often easiest for beginners because you can design the opening around its existing dimensions. If the frame is intended for a specific wall, shelf, or gift box, consider those limitations before cutting or decorating.
Measure and Fit the Photo
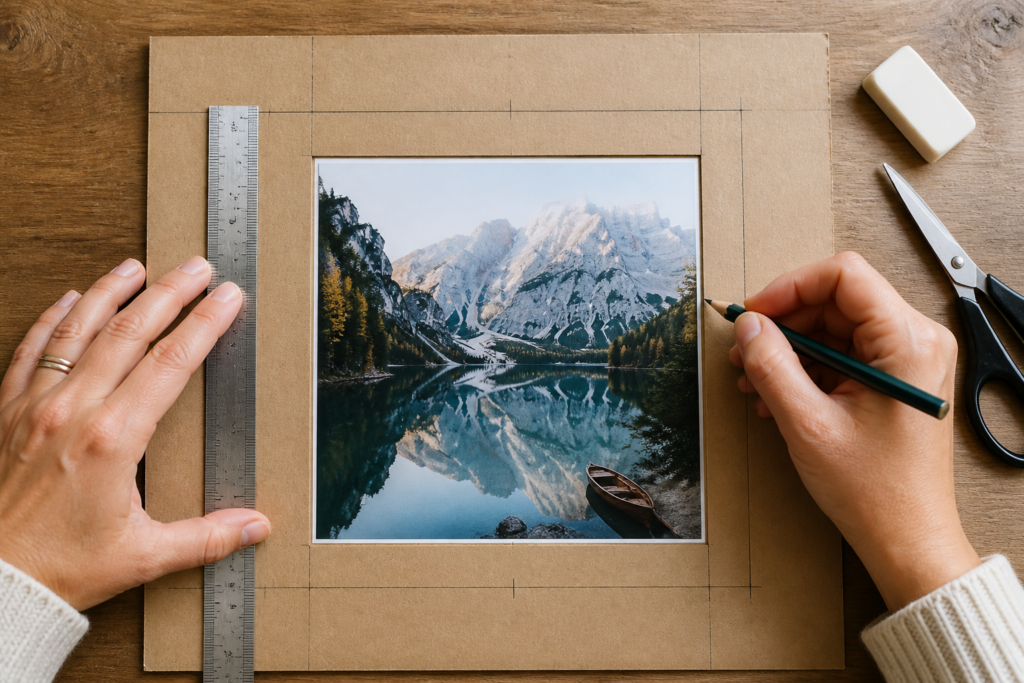
Accurate measuring helps your homemade picture frame look neat and keeps the photo securely in place. Begin by measuring the width and height of the photo. Then decide how much of the picture should remain visible. The frame should overlap the outer edges slightly, but it should not cover faces, text, or other important details.
For a cardboard, cardstock, or foam board frame, place the photo on the material and lightly trace around it. Next, mark an inner opening that is slightly smaller than the photo. This creates a narrow border that holds the photo behind the front of the frame. Use a ruler to check that the lines are straight and that the border is even on all sides.
If you are trimming the photo itself, mark the cutting area on the back rather than the front. Double-check the measurements before cutting. It is usually better to leave a little extra material and refine the edge than to cut away too much at once.
Step-by-Step: Create and Decorate the Frame
Cut or Prepare the Frame
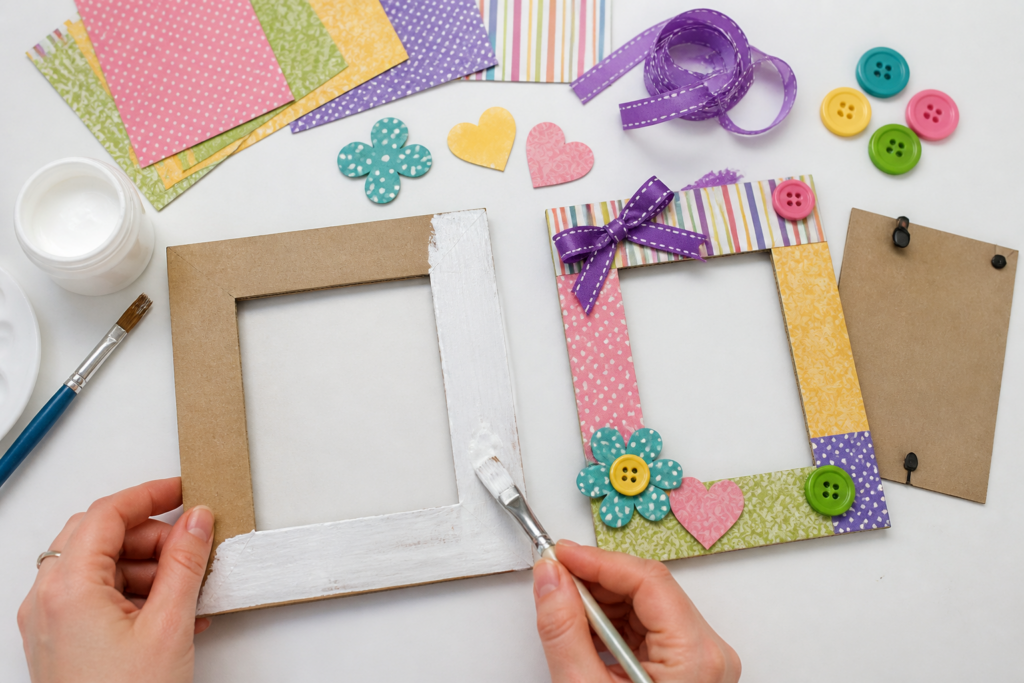
To make a basic cardboard frame, cut a rectangle or square larger than the photo. The outer dimensions can be adjusted to create a narrow or wide border. Use a ruler and pencil to mark the center opening. Carefully cut along the lines with scissors if the material is thin. For foam board or thick cardboard, a craft knife and cutting mat may create cleaner edges, but these tools require adult handling and attention.
Prepare a second piece of cardboard for the backing. It should be approximately the same size as the outer frame or slightly smaller. This backing will support the photo and help the frame keep its shape. Leave the top edge partly open or use removable photo corners so the picture can be changed later.
For a wooden frame, check that the opening and backing fit the photo. If the frame already includes glass or a clear insert, handle it carefully and place it on a protected surface while decorating.
Add Color and Texture
Paint is one of the easiest ways to personalize a frame. Apply thin, even coats instead of one heavy layer. Allow each coat to dry before deciding whether another is needed. Simple colors can create a polished look, while stripes, dots, geometric shapes, or brushstroke patterns add a more playful effect.
You can also cover the frame with decorative paper or fabric. Apply a thin layer of glue to the frame surface, place the paper or fabric carefully, and smooth it from the center toward the edges. This helps reduce wrinkles and air pockets. Fold or trim the excess material around the edges, taking care not to cover the photo opening.
Layering is another easy photo frame craft technique. For example, glue a solid-colored paper layer to the base, then add a smaller strip of patterned paper around the opening. Keep the layers flat and allow the adhesive to set before adding another piece.
Attach Embellishments
Decorations can reflect the subject of the photo or the personality of the person receiving the frame. Arrange buttons, beads, ribbon, shells, stickers, or paper shapes on the frame before gluing anything down. This gives you a chance to balance the colors and spacing.
Use craft glue for lightweight paper, fabric, and ribbon. Heavier items may need a stronger adhesive that is suitable for the frame material. Follow the product instructions and apply only as much glue as needed. Too much adhesive can seep onto the front surface or make decorations slide out of position.
Avoid blocking the photo opening. Decorations placed along the outer corners or border are less likely to hide important parts of the image. If the frame will hang on a wall, keep the overall weight in mind. A heavily decorated frame may need a sturdier backing or stronger hanging attachment.
Secure the Photo and Add a Stand
When the decorations and paint are completely dry, place the photo behind the frame. Photo corners, removable tape, or photo-safe adhesive can hold it in position. Avoid applying ordinary glue directly to an important original photograph, since it may be difficult to remove later. If you want the image to be replaceable, use a backing that opens from the top or side.
For a tabletop frame, make a simple easel from folded cardboard. Cut a long strip, fold it into a triangular support, and attach it to the back with strong tape or glue. You can also use a ready-made frame stand if the base is heavy enough to support it.
For wall display, attach a hanging loop or use hardware designed for the frame’s weight. Test the attachment gently before placing the frame above furniture or in a busy area.
Creative Custom Photo Frame Ideas
The best personalized photo frames often connect the decoration to the picture. A nature-themed frame might use green paint, paper leaves, pressed shapes, or small wooden accents. For a travel photo, consider a simple map-print border, ticket-shaped paper pieces, or colors inspired by the destination.
Seasonal designs can be changed throughout the year. Try paper snowflakes for winter, bright flowers for spring, painted leaves for autumn, or colorful shapes for summer. A birthday frame could include a ribbon border, paper balloons, or a handwritten name and date.
For a family photo, add a short message around the outer border. A school project might use alphabet stickers, crayons, or a collage of paper shapes. Fabric scraps can create a soft, textured look, while recycled packaging, old greeting cards, and clean magazine pages offer inexpensive decoration options.
When choosing colors, consider both the photo and the place where the frame will be displayed. Coordinating with a dominant color in the image can make the picture feel integrated into the design. Neutral colors work well in many rooms, while brighter combinations can make a small frame stand out on a shelf or desk.
Tips for a Durable, Neat Finish
- Measure twice before cutting the frame opening or backing.
- Use a straightedge to create clean lines and even borders.
- Choose an adhesive that matches the materials and the weight of the decorations.
- Remove excess glue before it dries whenever possible.
- Trim loose threads from fabric and ribbon.
- Do not overload a lightweight cardboard frame with heavy embellishments.
- Allow paint, glue, and sealers to dry fully before handling the frame.
- Use a clear protective sealer only when it is appropriate for the paint or paper surface.
A neat finish often depends more on patience than advanced skill. Work in thin layers, let each stage dry, and inspect the edges before moving on. If a paper corner lifts, secure it with a small amount of glue and press it flat while it sets.
Easy and Safe Variations for Children
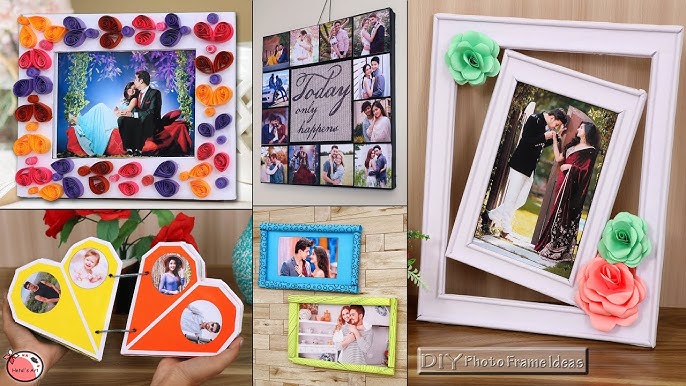
Children can enjoy making custom photo frames with a simplified design. Adults can pre-cut the frame, backing, and decorative paper, leaving children to paint, draw, and arrange the decorations. Washable paint, crayons, large stickers, fingerprints, and paper shapes are suitable choices for many craft sessions.
For younger children, avoid small pieces that may be placed in the mouth. Use large foam shapes, wide ribbon, or pre-cut cardstock instead of tiny beads and buttons. An adult should handle craft knives, hot glue, glass inserts, and any other sharp or potentially hazardous tools.
A simple activity is to paint a cardboard frame and add fingerprint flowers, dots, or animals around the border. Older children can plan a theme, measure the opening, and create a stand with guidance. Keep the construction straightforward so the focus remains on creativity rather than precision.
How to Display or Give the Finished Frame
Tabletop frames work well on desks, bookshelves, bedside tables, and entryway consoles. Check that the stand opens fully and that the frame sits level. For a wall display, confirm that the hanging loop or hardware is firmly attached before mounting it.
A custom photo frame also makes a meaningful handmade gift for birthdays, graduations, holidays, and family occasions. Add a short note on the back explaining the date, place, or memory shown in the photo. If you are giving the frame before inserting a picture, include a printed image separately or leave space for the recipient to add one.
Wrap the finished frame in tissue paper or place it in a shallow gift box. Protect raised decorations with a layer of soft paper so they do not catch on the wrapping. Before giving or displaying the frame, make sure all painted and glued areas are dry and that the backing is secure.
Frequently Asked Questions
What basic craft supplies are needed to make a custom photo frame?
You typically need a frame base, photo, scissors, ruler, pencil, adhesive, and decorating materials such as paint, paper, fabric, stickers, buttons, or ribbon. A craft knife, cutting mat, paintbrushes, and hanging hardware are optional.
What materials work best as a frame base?
Cardboard is affordable and easy to cut, cardstock is useful for lightweight designs, foam board creates a thicker frame, and unfinished wood offers greater durability. Choose based on the intended display location and the decorations you plan to add.
How do I measure and fit a photo correctly?
Measure the photo and mark an opening that is slightly smaller so the frame overlaps the edges. Use a ruler for straight lines, check the measurements before cutting, and leave enough border to secure the picture without covering important details.
Which adhesive should I use for photo frame decorations?
Craft glue is suitable for most paper and fabric decorations. Heavier items may require a stronger adhesive designed for the materials involved. Use photo-safe corners or adhesive when attaching a picture you want to preserve or replace later.
How long does it take to make a DIY photo frame?
A simple design may take about 30 minutes, while a painted or layered frame can take a few hours because of drying time. Complex decorations, multiple coats of paint, and protective sealing will add to the project time.
How can children safely make personalized photo frames?
Use pre-cut pieces, washable paint, child-safe glue, large decorations, stickers, and paper shapes. Adults should supervise the use of scissors and handle craft knives, hot glue, glass, and small pieces when necessary.
How can I make the finished frame more durable?
Use a sturdy base, suitable adhesive, secure backing, and balanced decorations. Trim loose materials, remove excess glue, and let every layer dry completely. A compatible protective sealer may help protect some painted or paper-covered surfaces.
Making custom photo frames is an affordable, approachable craft that can be adjusted to almost any style. Start with a simple base, measure carefully, and use supplies you already have before purchasing extra decorations. With a little planning, a plain frame can become meaningful home decor or a handmade gift built around a favorite memory.